A custom branded domain name instantly makes your e-commerce store look more professional and trustworthy, like you mean business. Instead of a generic URL like mystore.digivalie.co.za, you get a clean, memorable name like www.mystore.co.za.
That makes it easier for customers to remember you, find you again, and take you seriously. It also strengthens your brand, improves your visibility on Google, and gives you full control over your online identity.
And the best part is that a custom .co.za domain costs around R100 per year if you buy it from Domain.co.za. In this tutorial, we are going to show you the steps that you need to follow to connect your domain to your store.
Step 1. Register your domain name (skip this step if you already have a domain name)
If you do not have a domain name yet, then you need to start with this step. If you already have a domain name, then you can skip step 1. We currently recommend 2 domain name registrars that include domains.co.za and hostafrica.co.za.
Any other domain name provider will also work. We are going to use domain.co.za as an example. Go to their website and then type the name of your business into the search bar. Next, you should choose the correct TLD. In South Africa, most people use the .co.za extension, but you can choose any TLD you want.
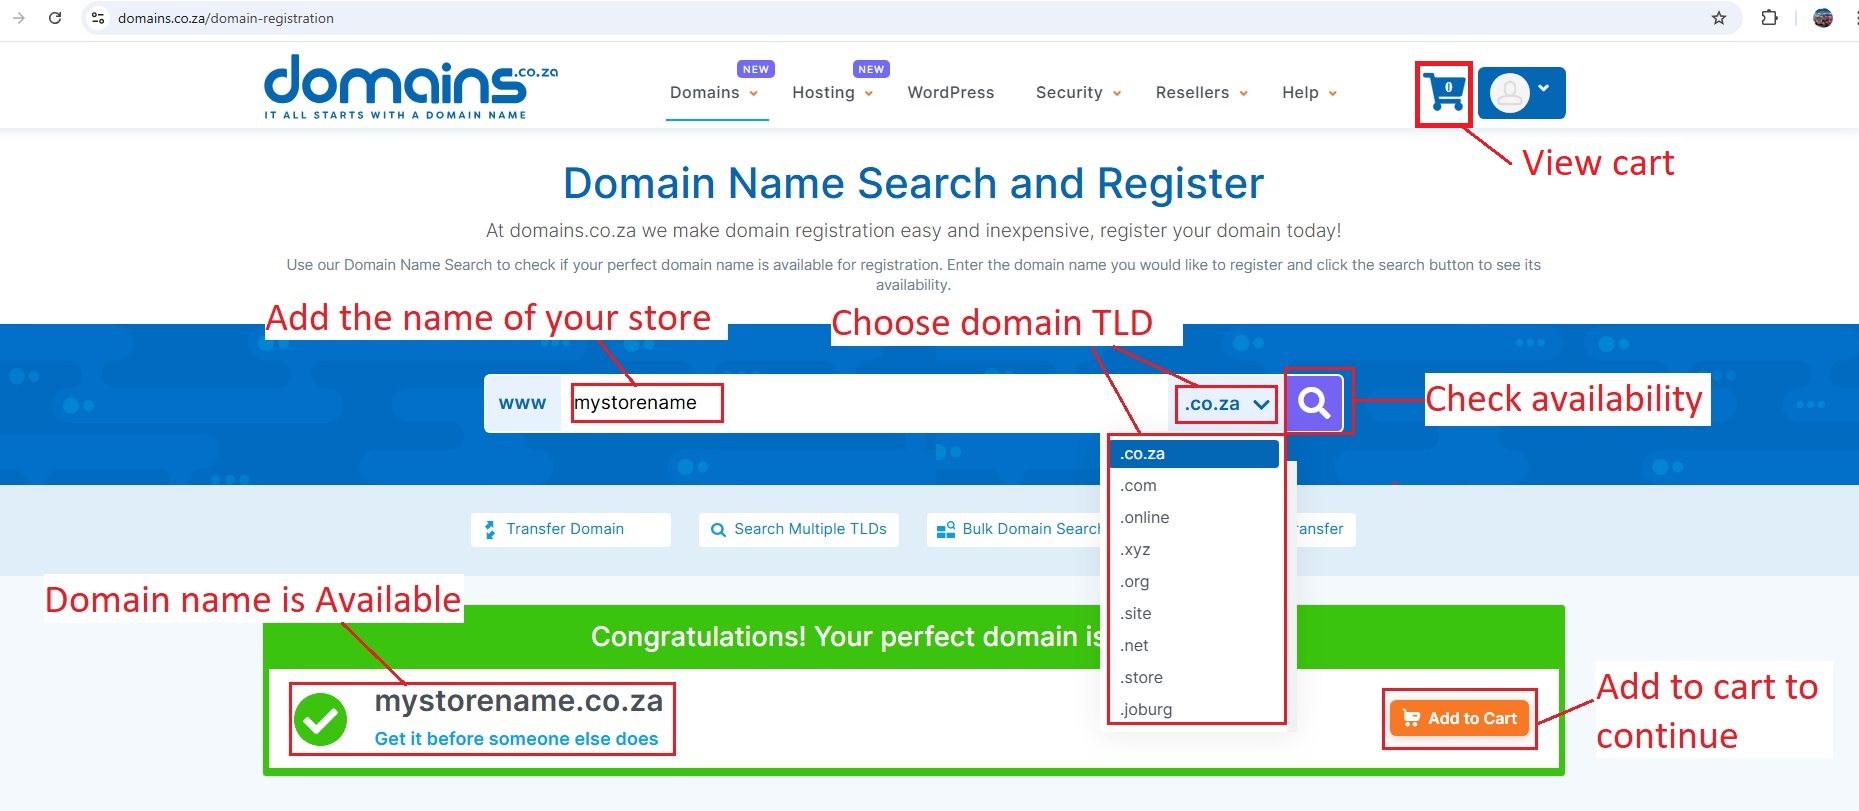
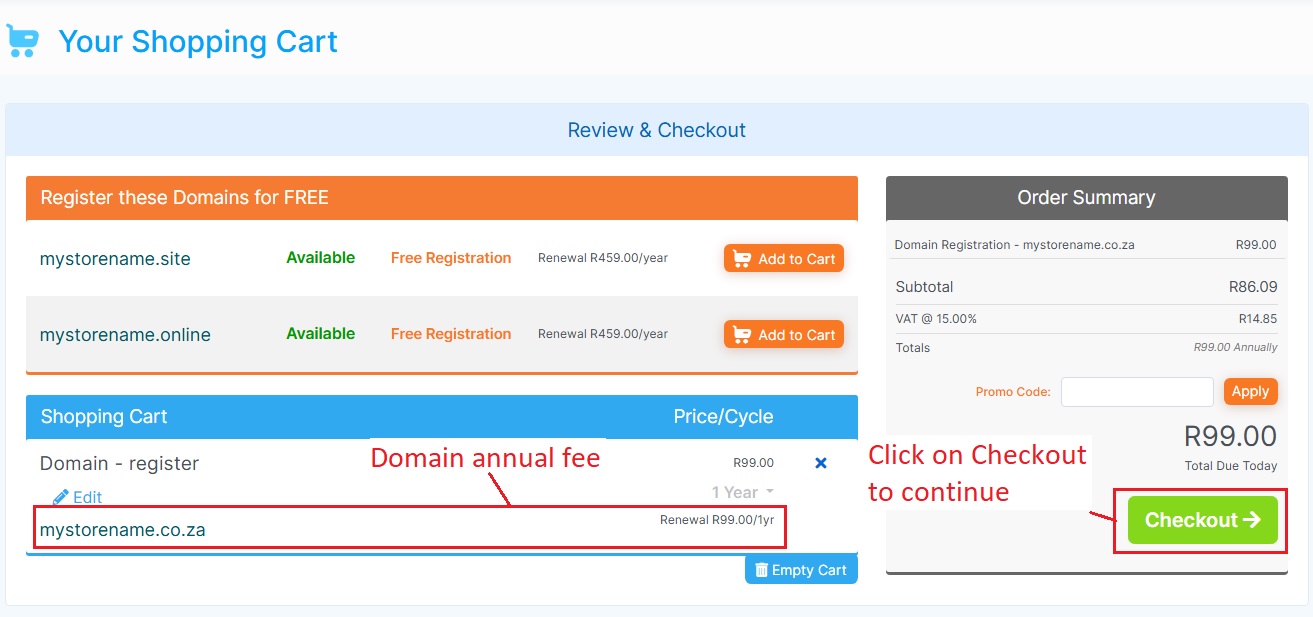
Click on the search button to see if the domain name is available, and then click on “add to cart” to continue. Once added, you can click on the cart icon to continue. You will then see all the items in your cart. We recommend that you only have the domain name. Any other items, such as ICANN, are optional. Click on checkout to continue with the process.
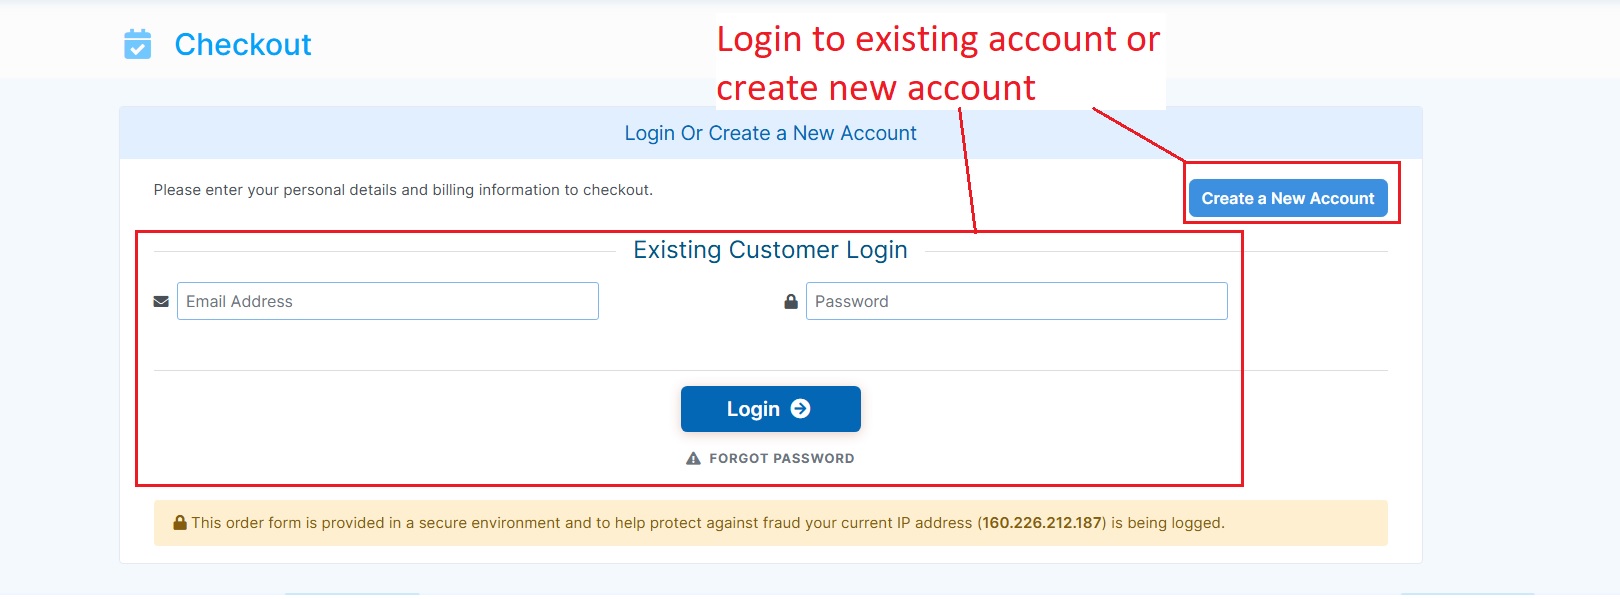
Before you can buy the domain name, you will need to create an account with them or log in to an existing account if you already have one. Go through the account creation process and then purchase the domain name from them. You will also now be able to log in to your account.
Once you log into your account, you need to make sure to enable the renewal of your domain so that you do not lose it. Let’s go to the next step to update your nameservers.
Step 2. Update your nameservers to our hosting
For this step, you need to log in to your account where you registered the domain name in order to add our nameservers to your domain. This will form a connection between your domain and our servers, which will enable us to link your store to your domain.
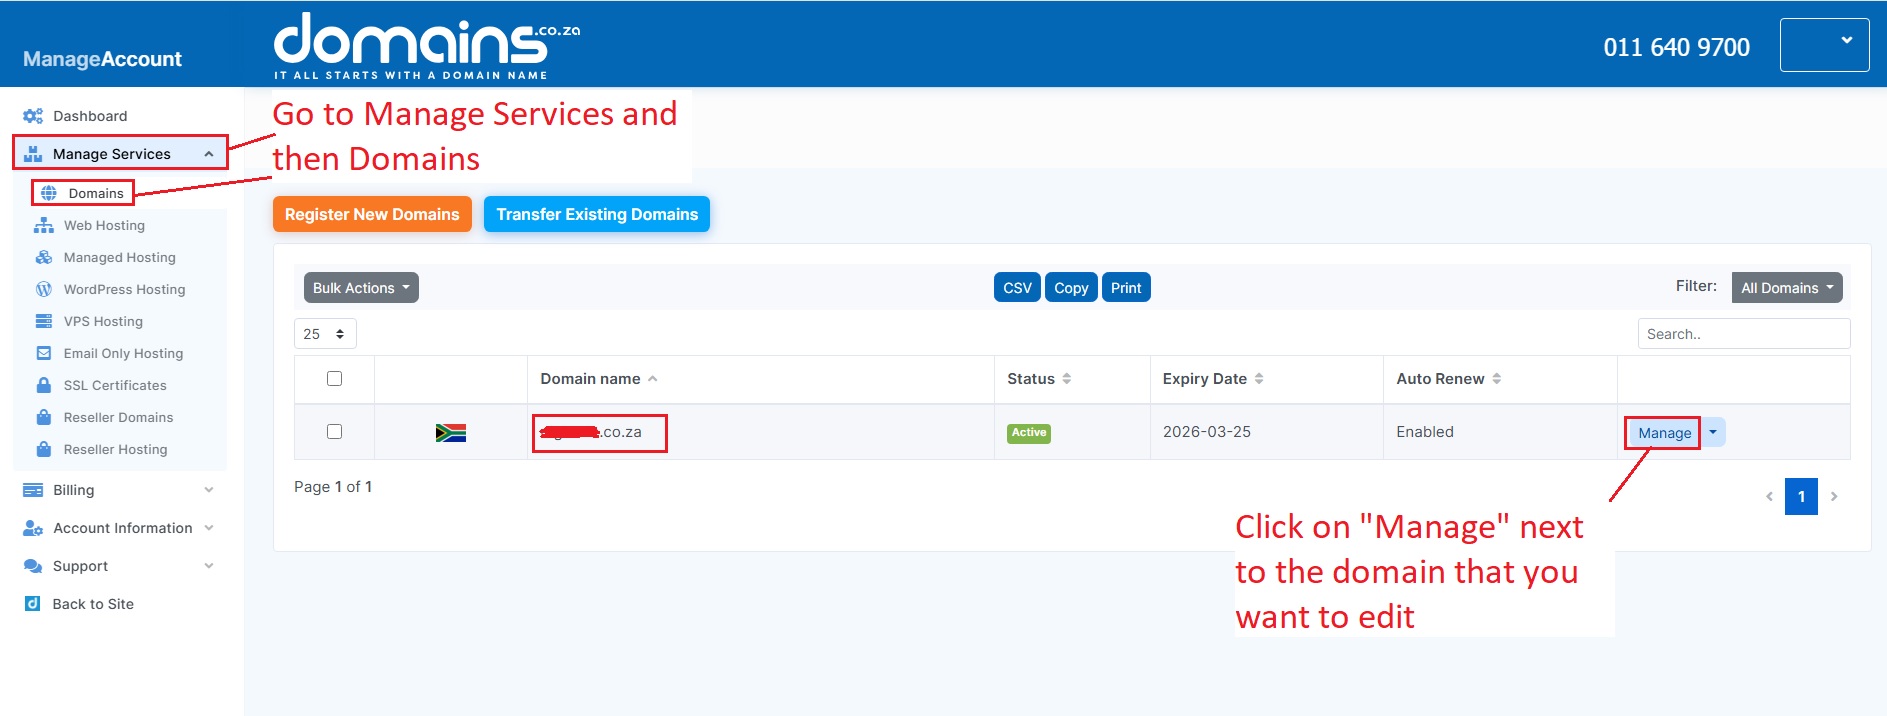
Go to the dashboard of your account and then click on the “manage services” section located to the left of the screen. The menu will expand, where you then need to click on domains. Click on “manage” next to the domain that you just bought or to which you want to point to your store.
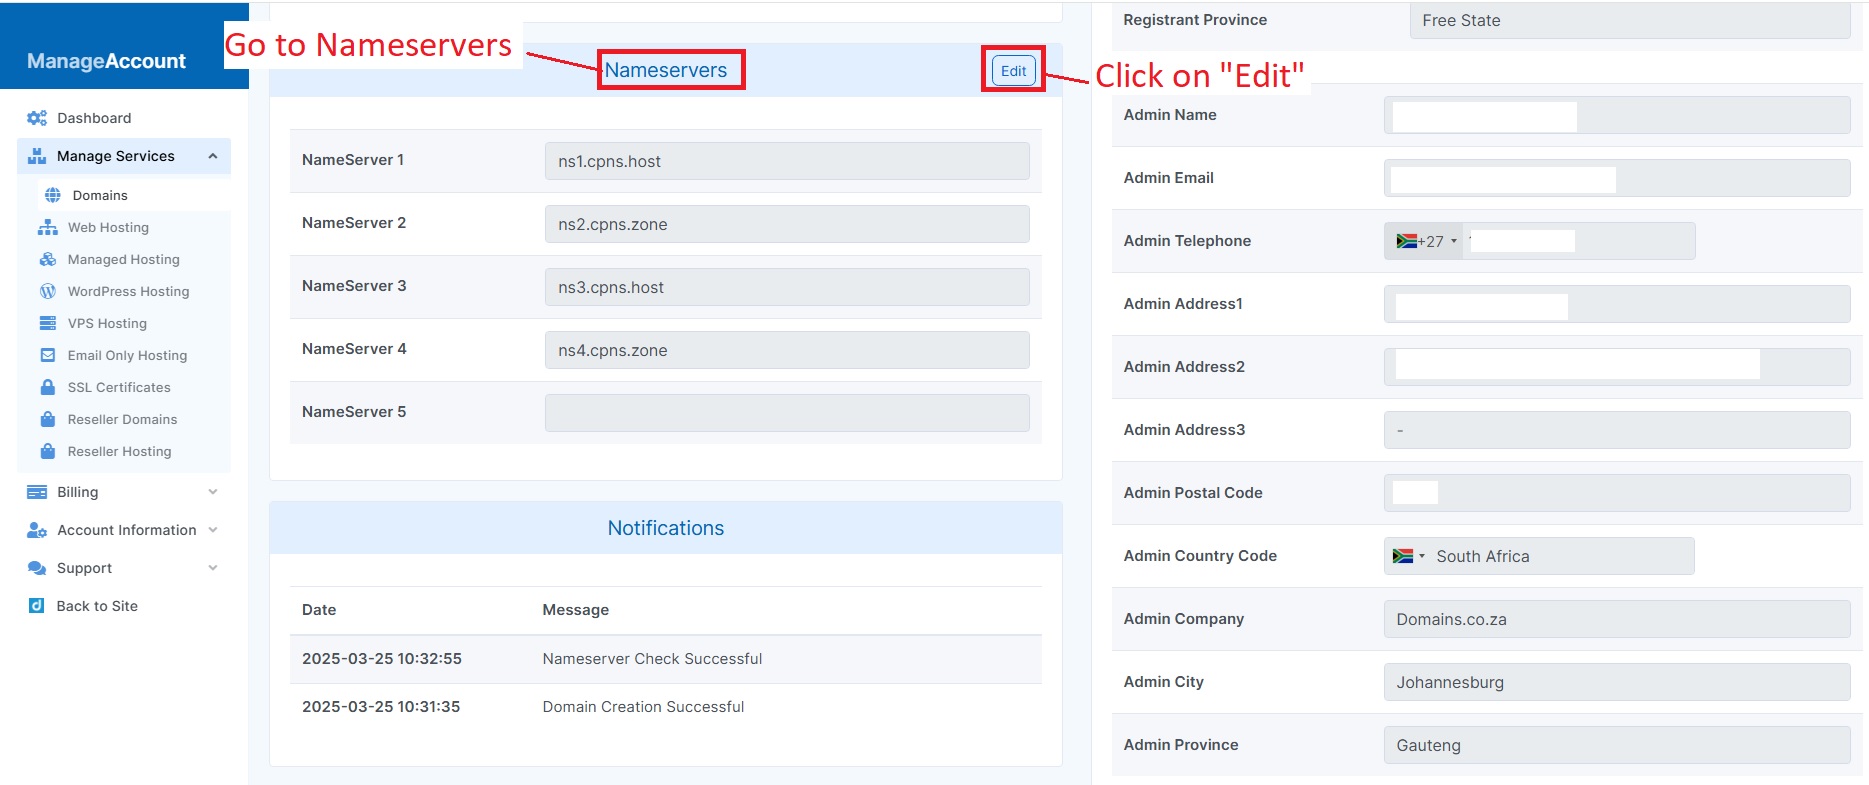
The screen will load, where you then need to scroll down to the section labeled as “Nameservers”. Click on the “edit” button once you have found this section. Deselect the button labeled as “Use Our Nameservers” because we want to use our own servers.
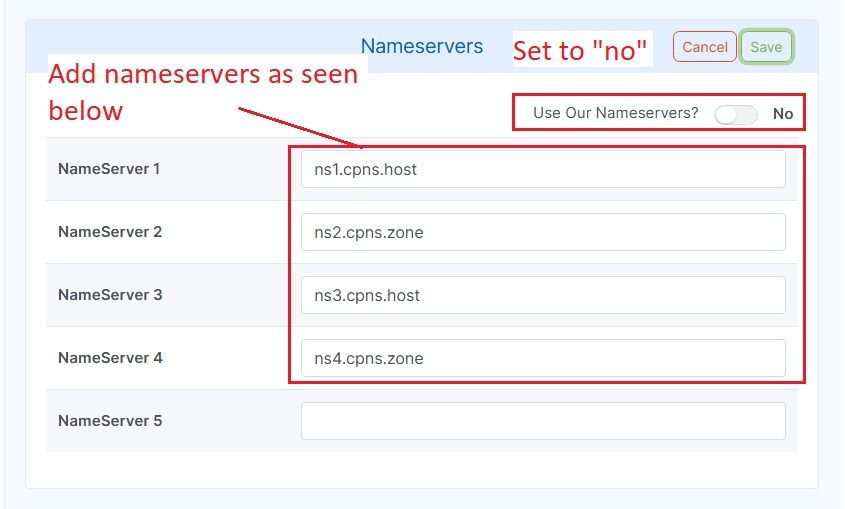
Below are the nameservers that you need to copy over. You will also see in the screenshot where each one should go.
ns1.cpns.host
ns2.cpns.zone
ns3.cpns.host
ns4.cpns.zone
Once you have added the nameservers, you can click on save. Once done, you then need to notify us of the new domain that you want to add to your account.
Step 3. Submit your domain to us
Now that your domain is connected to our servers, we can then add your domain to your hosting plan, create its installation, and then copy your store over to the domain’s installation. Please use the submission form below to send us the information.
Submit Your Domain Name
This process might take a day or two because of domain name propagation. Once we copy over your store, we will then delete the old store, and you can resume with the store on your new domain. All the changes you made to your old store will also be copied over.
Very important !!!
Once you submit the information to us, then we recommend that you do not continue with your old store until your new store is set up, as you will lose all the progress you made. We will send you an email to notify you when your new store is ready, so that you can continue with your new store.